| Thursday, January 28, 2010 |
| Flatbread Craze |
 We have been on a pizza craze around here lately! There was a time that I completely stayed away from it since we mostly ate pizza out and, at the time, we did not have options for dairy free pizza. Besides, isn't the cheese the best part...I have discovered...it is not! So, now that it is even harder to get pizza out for the gluten intolerant here(on the budget and for the stomach), we have been making our own. The illustrator really likes the Bob's Red Mill pizza dough. So, while I make that one for him and my gluten laden standby for the kids, I have been playing around with some gluten free options for me to try out before I give them to him. I hate working on something and have it turn out bad or worse than what he could have had. So, lately I have been making flatbread like crazy. I have been combining all kinds of flours. In all honesty, I haven't really come across any I don't like. This one from last night (hence the dark photos) was by far my favorite! It had a crispy bottom crust while it was soft and chewy on the inside. It is gluten free, so it's not your typical fluffy pizza dough. Which, for me, I really like! Don't get me wrong, I like fluffy pizza dough, but I have always loved flatbread. We have been on a pizza craze around here lately! There was a time that I completely stayed away from it since we mostly ate pizza out and, at the time, we did not have options for dairy free pizza. Besides, isn't the cheese the best part...I have discovered...it is not! So, now that it is even harder to get pizza out for the gluten intolerant here(on the budget and for the stomach), we have been making our own. The illustrator really likes the Bob's Red Mill pizza dough. So, while I make that one for him and my gluten laden standby for the kids, I have been playing around with some gluten free options for me to try out before I give them to him. I hate working on something and have it turn out bad or worse than what he could have had. So, lately I have been making flatbread like crazy. I have been combining all kinds of flours. In all honesty, I haven't really come across any I don't like. This one from last night (hence the dark photos) was by far my favorite! It had a crispy bottom crust while it was soft and chewy on the inside. It is gluten free, so it's not your typical fluffy pizza dough. Which, for me, I really like! Don't get me wrong, I like fluffy pizza dough, but I have always loved flatbread.
 This dough is really high in protein too! I love finding ways to get more protein in my diet and to be able to get it in my breads is even more of a bonus! I also decided to add some thinned out hummus on the top after I saw the idea on HEAB's site who got the idea from Mae's site. I did not have nutritional yeast (since I had a bad experience with it before), but I would like to try it out some time. This dough is really high in protein too! I love finding ways to get more protein in my diet and to be able to get it in my breads is even more of a bonus! I also decided to add some thinned out hummus on the top after I saw the idea on HEAB's site who got the idea from Mae's site. I did not have nutritional yeast (since I had a bad experience with it before), but I would like to try it out some time.
 So, last nice was a delicious flatbread pizza with red peppers, green peppers, onion and hummus! So good...I will definitely be doing this more often! This is really so easy and so good! So, last nice was a delicious flatbread pizza with red peppers, green peppers, onion and hummus! So good...I will definitely be doing this more often! This is really so easy and so good!
 Chickpea Oat Flatbread Chickpea Oat Flatbread
for 1
1/2 cup oats (blend in the food processor for a second if using whole oats)
3 TBSP chickpea flour or garfava flour
1/2 tsp instant yeast
1/4 tsp salt
2 oz warm water (about 100-110 degrees)
3 TBSP egg whites (I used the kind in the carton, but you could use real or probably a whole egg)
Combine the oats, chickpea flour, yeast and salt in a bowl. Next, add the egg whites to the mixture and then the water. Mix it together really well for a minute to get everything mixed well and to agitate the yeast. Cover with a towel and put in a warm place for 30 minutes to an hour while you work on the other ingredients and preheat your oven to 425 degrees. Line a baking pan with parchment paper. Then pour the dough onto the lined baking sheet. Wet your hands and flatten the dough to make a round. It will be thinner in texture than regular pizza dough, but it will flatten out into a nice circle just make sure you keep your hands wet. Make it as thin as you like. Bake 425 degrees for 5 minutes. Then top it with your favorite toppings and bake for 10 more or until the dough is nice and crispy on the bottom.Labels: beans, breads, gluten free, main course, vegetables |
posted by Sarena Shasteen - The Non-Dairy Queen @ 9:40 AM  |
|
|
|
| Monday, January 25, 2010 |
| Basic Pressure Cooker Chickpeas |
 We have been really busy around here lately cleaning up the house. I love the holidays and all the the activity it brings, but afterwards, you just feel like you need a complete housing cleanse! Also, I wonder...if we spring clean now, will it bring spring here any faster? I hope so! We have been really busy around here lately cleaning up the house. I love the holidays and all the the activity it brings, but afterwards, you just feel like you need a complete housing cleanse! Also, I wonder...if we spring clean now, will it bring spring here any faster? I hope so!
 Things have been pretty simple as far as food goes, lately. When we are really busy, we keep things quick and basic. That being said, there is not a whole lot of cooking going on unless it is a throw together and leave it kind of thing. As some of you know, I am very thrifty. So, I am always looking for a less expensive way to do everything in the kitchen. I have also discovered my extreme love of the pressure cooker, especially when I cook beans. In fact, I think my pressure cooker has become my bean factory! I can buy a 1 lb. bag of chickpeas for $1.59. This bag will give be about 6 1/2 cups cooked chickpeas. That is a great deal if you ask me. This saves me time and money! We always have these on hand since hummus is a great healthy snack or meal and we eat a lot of hummus around here! You know how your mom used to tell you not to lick the knife when something good was smeared all over it? Well, I have to remind myself of that when I make hummus...don't lick the blades! Things have been pretty simple as far as food goes, lately. When we are really busy, we keep things quick and basic. That being said, there is not a whole lot of cooking going on unless it is a throw together and leave it kind of thing. As some of you know, I am very thrifty. So, I am always looking for a less expensive way to do everything in the kitchen. I have also discovered my extreme love of the pressure cooker, especially when I cook beans. In fact, I think my pressure cooker has become my bean factory! I can buy a 1 lb. bag of chickpeas for $1.59. This bag will give be about 6 1/2 cups cooked chickpeas. That is a great deal if you ask me. This saves me time and money! We always have these on hand since hummus is a great healthy snack or meal and we eat a lot of hummus around here! You know how your mom used to tell you not to lick the knife when something good was smeared all over it? Well, I have to remind myself of that when I make hummus...don't lick the blades!
 Anyway, I know a lot of people are afraid of pressure cookers. They have seriously come a long way and if you follow the directions that come with your pot, you really can't go wrong. They really are a great tool in the kitchen that will ultimately save you a lot time and money! Anyway, I know a lot of people are afraid of pressure cookers. They have seriously come a long way and if you follow the directions that come with your pot, you really can't go wrong. They really are a great tool in the kitchen that will ultimately save you a lot time and money!
Pressure Cooker Chickpeas
1 lb. dried chickpeas
Soak chickpeas over night (or at least 8 hours) covered in water in the fridge.
Next day, drain off the water. Put chickpeas in the pressure cooker. Cover with water until it is 2 inches over the beans. (I normally measure out how many cups of soaked beans I am putting in the pot and then do 2 extra cups of water. That normally does the 2 inches for me.) Seal with the lid. Turn the stove on high to bring to pressure. When the top starts to toddle or it comes to full pressure, turn down to medium high so it toddles at an even rate. Set timer for 15 minutes. When it is done, turn it off and do a quick pressure release. I have to put mine under cold water until the release button goes down, but you should follow your manufacturers instructions on this. Your chickpeas are ready to be seasoned. I like to season beans as I go since I never know what I am going to use them in.
Note* Don't salt beans until they are done cooking. It makes them tough if you do.Labels: beans, gluten free, main course |
| posted by Sarena Shasteen - The Non-Dairy Queen @ 5:02 PM |
|
|
|
| Sunday, January 24, 2010 |
| Quinoa Qookies Review |
Today has started out kind of strange for me (we woke up about 8:45 and just laid there comatose until 9:45). We were up and running around at 5:30am yesterday for my oldest son's Lego Robotics State Competition that was held in downtown Atlanta. So, I did not cook anything, except my morning and evening oatmeal. In which, I did discover that you can total make a bad bowl of oatmeal if you are not paying attention to what you are doing and you are too tired to think! Anyway, I am so proud of him for making it as far as he did and I think it was such a great experience! Now, that being said...all I have today is a review. I have a lot of house work to do today, but I am hoping there will be some baking done sometime along the way!
 The maker of Quinoa Qookies sent me a package to taste and review. I am always appreciative when I am asked to review products! I received this package in the mail and was excited to give a gluten free/dairy free cookie cookie a try. I do make most of the treats we eat here from scratch, but it's always nice to have a quick go to option in the pantry! I am definitely drawn to healthier sweet options, as that is how I like to eat and feed my family. I loved that these are made with quinoa, since that is one of my newly discovered favorite foods. I had not tried it in a sweet version yet, so I was looking forward to seeing how these taste. Of course, now that the illustrator has celiac, I am definitely happy when I see gluten free options that are healthy for him. The maker of Quinoa Qookies sent me a package to taste and review. I am always appreciative when I am asked to review products! I received this package in the mail and was excited to give a gluten free/dairy free cookie cookie a try. I do make most of the treats we eat here from scratch, but it's always nice to have a quick go to option in the pantry! I am definitely drawn to healthier sweet options, as that is how I like to eat and feed my family. I loved that these are made with quinoa, since that is one of my newly discovered favorite foods. I had not tried it in a sweet version yet, so I was looking forward to seeing how these taste. Of course, now that the illustrator has celiac, I am definitely happy when I see gluten free options that are healthy for him.
 That being said, when I do a review, I always look at all aspects of the product and who it appeals to. I am a pretty open minded person when it comes to food because I know everybody has different tastes. I am a lot more open about the way natural sweet things taste and I normally try everything more than once to give it a chance. Because there are four of us here, I like to have everyone give it a try so I can give a full review. Unfortunately, the quinoa qookies were not a favorite around here. I, personally, thought they were a good representation of a natural cookie. I thought they were kind of like a shortbread. I saw another review where they were said to be chewy and mine were not chewy at all. They weren't too sweet so they would go well with a nice cup of tea or coffee. My kids and husband were not very impressed. They are the cookie people in my family and since these are gluten free, I thought I would have the man with celiac give them a try. I also looked up the price and how to get them. I have to say that $4.95 plus shipping seems a little expensive, to me, for three cookies. I know that there are others that would be willing to pay that price, but I just could not imagine doing it. I spoke with the creator of the cookie and he said that he sold out of them at a demo he did at a health food store just recently. So, it appears that a large amount of people do really like them! So, if you are looking for a go to sweet that is gluten and dariy free, I would say these Quinoa Qookies are worth a try. That being said, when I do a review, I always look at all aspects of the product and who it appeals to. I am a pretty open minded person when it comes to food because I know everybody has different tastes. I am a lot more open about the way natural sweet things taste and I normally try everything more than once to give it a chance. Because there are four of us here, I like to have everyone give it a try so I can give a full review. Unfortunately, the quinoa qookies were not a favorite around here. I, personally, thought they were a good representation of a natural cookie. I thought they were kind of like a shortbread. I saw another review where they were said to be chewy and mine were not chewy at all. They weren't too sweet so they would go well with a nice cup of tea or coffee. My kids and husband were not very impressed. They are the cookie people in my family and since these are gluten free, I thought I would have the man with celiac give them a try. I also looked up the price and how to get them. I have to say that $4.95 plus shipping seems a little expensive, to me, for three cookies. I know that there are others that would be willing to pay that price, but I just could not imagine doing it. I spoke with the creator of the cookie and he said that he sold out of them at a demo he did at a health food store just recently. So, it appears that a large amount of people do really like them! So, if you are looking for a go to sweet that is gluten and dariy free, I would say these Quinoa Qookies are worth a try.
Written for Go Dairy FreeLabels: gluten free, product reviews |
| posted by Sarena Shasteen - The Non-Dairy Queen @ 11:26 AM |
|
|
|
| Friday, January 22, 2010 |
| Oven Roasted Red Cabbage...YUM! |
 I have been feasting on this purple cabbage for a while now. I love the color and crunch it gives to everything! It was a huge head of cabbage, originally, so after many salads and omelets, I decided to try something else with it. I was thinking...I have had oven roasted brussell sprouts before, but not cabbage. I thought I would give it a try. I loved the deep sweet flavor roasting gave this beautiful gem. Honestly, what vegetables doesn't get sweeter and better when you roast it? I have been feasting on this purple cabbage for a while now. I love the color and crunch it gives to everything! It was a huge head of cabbage, originally, so after many salads and omelets, I decided to try something else with it. I was thinking...I have had oven roasted brussell sprouts before, but not cabbage. I thought I would give it a try. I loved the deep sweet flavor roasting gave this beautiful gem. Honestly, what vegetables doesn't get sweeter and better when you roast it?
 Oven Roasted Cabbage Oven Roasted Cabbage
2 lb head of red cabbage quartered
salt
pepper
cooking spray (or oil of your choice)
Preheat oven to 400 degrees. Spray a baking sheet with cooking spray. Place the cabbage wedges on the baking sheet with the cut side up. Spray with a little cooking spray, sprinkle with salt and pepper. Bake for 30 to 40 minutes until cooked to your liking.
 I like to eat my cooked vegetables on the crisp side so if you like them more cooked then go a little longer. I am definitely a crunchy girl when it comes to my veggies though! There was a nice contrast in texture to the wedges too. The outer parts got crispy (like kale chips) and the insides were softer and sweet. Really nice flavor all the way through! I like to eat my cooked vegetables on the crisp side so if you like them more cooked then go a little longer. I am definitely a crunchy girl when it comes to my veggies though! There was a nice contrast in texture to the wedges too. The outer parts got crispy (like kale chips) and the insides were softer and sweet. Really nice flavor all the way through!
 I discovered the other day, I eat everything on a salad. I know, it seems weird, but I like it. I guess I could eat the salad on the side, but I like using my food components as a dressing, if you will. Also, I eat a lot of lettuce and I am not going to justify it! So, I chopped a quarter of the roasted cabbage up and put it on my salad for lunch. I discovered the other day, I eat everything on a salad. I know, it seems weird, but I like it. I guess I could eat the salad on the side, but I like using my food components as a dressing, if you will. Also, I eat a lot of lettuce and I am not going to justify it! So, I chopped a quarter of the roasted cabbage up and put it on my salad for lunch.
 It was so good! The juices from the cabbage were like a light dressing on the lettuce. The only thing I wish I had on it...was a big scoop of hummus. Because really, what salad is complete without hummus? It was so good! The juices from the cabbage were like a light dressing on the lettuce. The only thing I wish I had on it...was a big scoop of hummus. Because really, what salad is complete without hummus?Labels: gluten free, main course, side dishes, vegetables |
| posted by Sarena Shasteen - The Non-Dairy Queen @ 2:48 PM |
|
|
|
| Thursday, January 21, 2010 |
| Junk Food Flavors Made Healthy! |
 Today's theme is junk food flavors made healthy! Ok, so I lied before...more oatmeal. This one is smores oatmeal. Not your typical breakfast bowl. In fact, this one was an afternoon treat. Super simple snack for this cold rainy day! Today's theme is junk food flavors made healthy! Ok, so I lied before...more oatmeal. This one is smores oatmeal. Not your typical breakfast bowl. In fact, this one was an afternoon treat. Super simple snack for this cold rainy day!
Smores Oatmeal
serves 1
1/2 cup oats (gluten free if you need it)
1/2 cup almond milk
1/2 cup water
dariy free/gluten free graham crackers
dairy free/gluten free chocolate
marshmallows
Combine the oats, almond milk and water. Cook according to package directions. Garnish with graham crackers, chocolate and marshmallows!
 Next up...oven baked potato chips! I make the microwave version all the time when we have hummus. Microwave potato chips are the cheapest and easiest way to have a gluten free snack with hummus and the illustrator loves the combination, as do I! So, I was curious about making the chips in the oven. I wondered if they would be better or different in flavor. I also wondered what it would do for my time. The microwave chips have to be watched, so even though they are easy to make, they take quite a bit of baby sitting time. Well, initially, the oven baked chips are easier to throw in the oven, but I discovered that they need to be watched in the end since some of them finish before others depending on where they are on the pan. So, these are not any easier or harder or better...they are delicious no matter what! Next up...oven baked potato chips! I make the microwave version all the time when we have hummus. Microwave potato chips are the cheapest and easiest way to have a gluten free snack with hummus and the illustrator loves the combination, as do I! So, I was curious about making the chips in the oven. I wondered if they would be better or different in flavor. I also wondered what it would do for my time. The microwave chips have to be watched, so even though they are easy to make, they take quite a bit of baby sitting time. Well, initially, the oven baked chips are easier to throw in the oven, but I discovered that they need to be watched in the end since some of them finish before others depending on where they are on the pan. So, these are not any easier or harder or better...they are delicious no matter what!
 Oven Baked Potato Chips Oven Baked Potato Chips
Potatoes sliced thin (I do this by hand, but a mandoline would come in handy!)
Olive oil spray
Kosher salt
Fresh Ground Pepper
Preheat oven to 400 degrees. Place sliced potatoes in a bowl, spray with olive oil spray, sprinkle with salt and pepper. Mix everything around until everything is coated. Lay out in one layer on a parchment lined baking sheet. Bake for 10 minutes. Flip potatoes over and bake for another 10 minutes. Make sure you watch them carefully after flipping them to make sure they don't burn. That will depend on how thin they are cut.
 This is a little project I am working on...I have to make this...gluten free. The original is perfect in our opinion, but I made it up this summer and now that we have celiac disease in the family...it needs to be gluten free. It's a personal goal and a total labor of love! This is a little project I am working on...I have to make this...gluten free. The original is perfect in our opinion, but I made it up this summer and now that we have celiac disease in the family...it needs to be gluten free. It's a personal goal and a total labor of love!
 Labels: breads, breakfast, gluten free, main course, vegetables |
| posted by Sarena Shasteen - The Non-Dairy Queen @ 10:19 AM |
|
|
|
| Friday, January 15, 2010 |
| Extra Protein Cinnamon Oatmeal |
 I know, you are all probably tired of the oatmeal posts. I eat a lot of oatmeal. I love how it makes me feel. It's a warm, nutritious way to start the day and that is always a good thing! The options are unlimited as far as flavors go. I have even seen people go the savory route. I am not quite there yet, but when I saw this on Eat Live Run a while back, I thought it sounded interesting. This is the time of year when everyone is trying to make changes for the better in their diets, so I thought I would share this little experiment. Since I don't eat meat, I really like finding new and different ways to get protein in my diet. I have started eating more proteins at lunch and dinner, but I really wanted a way to add some protein to my oats. I was a little nervous about adding egg whites to my oatmeal. I wasn't sure if I would end up with an oatmeal omelet. So, since I was feeling a little adventuresome this morning, I went for it. I can't say how great this was! It did not taste like egg at all. This bowl of oatmeal was super thick and creamy! I loved the texture! So, if you are felling like you need a little extra boost in the protein department, you should definitely give this a try! I know, you are all probably tired of the oatmeal posts. I eat a lot of oatmeal. I love how it makes me feel. It's a warm, nutritious way to start the day and that is always a good thing! The options are unlimited as far as flavors go. I have even seen people go the savory route. I am not quite there yet, but when I saw this on Eat Live Run a while back, I thought it sounded interesting. This is the time of year when everyone is trying to make changes for the better in their diets, so I thought I would share this little experiment. Since I don't eat meat, I really like finding new and different ways to get protein in my diet. I have started eating more proteins at lunch and dinner, but I really wanted a way to add some protein to my oats. I was a little nervous about adding egg whites to my oatmeal. I wasn't sure if I would end up with an oatmeal omelet. So, since I was feeling a little adventuresome this morning, I went for it. I can't say how great this was! It did not taste like egg at all. This bowl of oatmeal was super thick and creamy! I loved the texture! So, if you are felling like you need a little extra boost in the protein department, you should definitely give this a try!
Cinnamon Vanilla Egg White Oatmeal
serves one
1/2 cup oats (quick cooking, regular or gluten free)
1/4 cup unsweetened applesauce
3 TBSP egg whites (I bought the kind in the carton)
1 1/4 cup water
5 drops NuNaturals Vanilla Stevia
cinnamon
sweetener of your choice
Almond milk on top
Mix everything together and microwave in 1 minutes intervals. Stir like crazy in between microwaving. Cooked to your desired consistency. The length of time you cook it will depend on what type of oats you are eating. Sweeten it however you like and then pour a little almond milk on top.
 I used Vanilla Stevia in this bowl of oats. The flavor is incredible! It gives a nice sweetness to the oats with a hint of vanilla. I used Vanilla Stevia in this bowl of oats. The flavor is incredible! It gives a nice sweetness to the oats with a hint of vanilla.Labels: breakfast, gluten free, main course |
| posted by Sarena Shasteen - The Non-Dairy Queen @ 12:45 PM |
|
|
|
|
| Carrot Cake Pancakes |
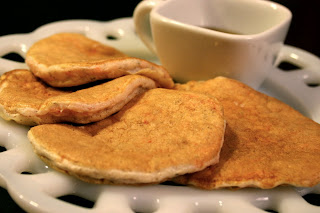 I turned 35 yesterday. Seriously, my parents sent me a card and I my dad said I was half way to 70. Ugh, that was uplifting! Ironically, I really had no problem turning 35. From the time I turned 30, up until now, I was always a little sad by birthdays. For some reason though, I was a lot more comfortable with this birthday! I had a great day with the illustrator which lead into a great evening with the kids! Since dinner was my call last night, I chose breakfast for dinner. My favorite! I am not much of a cake person (too sweet), I chose carrot cake pancakes. I figured two birds with one stone, right? I saw a recipe for pancakes using coconut flour on HEABs site a while back and was very interested in the high protein version of a pancake. Since I am always looking for ways to sneak protein into my diet, I really wanted to try these. Besides, they are dairy and gluten free! I followed her directions except I did not use protein powder since I don't have any that is dairy/soy free. The recipe is really good. I loved the high protein factor and the flavor was amazing. They are not your typical fluffy buttermilk pancake, but something completely different. I want to play around with them a little bit more before I post my favorite version, but take a look at Heather's version and give it a try. I turned 35 yesterday. Seriously, my parents sent me a card and I my dad said I was half way to 70. Ugh, that was uplifting! Ironically, I really had no problem turning 35. From the time I turned 30, up until now, I was always a little sad by birthdays. For some reason though, I was a lot more comfortable with this birthday! I had a great day with the illustrator which lead into a great evening with the kids! Since dinner was my call last night, I chose breakfast for dinner. My favorite! I am not much of a cake person (too sweet), I chose carrot cake pancakes. I figured two birds with one stone, right? I saw a recipe for pancakes using coconut flour on HEABs site a while back and was very interested in the high protein version of a pancake. Since I am always looking for ways to sneak protein into my diet, I really wanted to try these. Besides, they are dairy and gluten free! I followed her directions except I did not use protein powder since I don't have any that is dairy/soy free. The recipe is really good. I loved the high protein factor and the flavor was amazing. They are not your typical fluffy buttermilk pancake, but something completely different. I want to play around with them a little bit more before I post my favorite version, but take a look at Heather's version and give it a try.
Oh, and I am a dipper with syrup. I like the flavor of pancakes alone so I dip when I want a little sweetness.Labels: breakfast, quickbread |
| posted by Sarena Shasteen - The Non-Dairy Queen @ 9:28 AM |
|
|
|
| Wednesday, January 13, 2010 |
| Trying To Beat The Cold Weather! |
 So, I am freezing to death. I really think I am. Ok, not really, but it feels that way! I broke out in hives on Monday night and I think it is a reaction from the cold. It came out of nowhere. My skin was burning and itching all over. This happened one other time about 5 years ago and it was when we got a cold snap. I had no other antihistamines in the house except Benedryl and it has lactose in it. I had to take it. The illustrator offered to go and get me something else, but I was in need of something then and it was too late to go out looking for allergy medicine. So, I took it. Ugh, my stomach has been a mess for days now. Funny how some things like that stick with you for so long...not funny ha, ha though. So, I looked up hives to get a little more information and you can get them from food sources, but you can also get them from the cold. I am only assuming that is the problem, but it sounds pretty accurate to me. This time of year my asthma acts up too (I am a treat right now!). I have been taking my good old standby Alavert, so things are getting better. Not completely gone, but better. In addition to the allergy medicine, I have been trying to eat things that really help keep you warm and help you feel better. After my review of Almond Breeze a while back, I was told by a friend of mine that the chocolate version is amazing. So, the illustrator and I decided to give it a try. Wow, that stuff is so good! Too good if you ask me. I don't normally drink my calories, so I was a little worried about liking that one so much. I came across a less sweet version of the Chocolate Almond Breeze on sale and thought I would give it a try. I like being able to control the amount of sugar I am drinking. With only 45 calories a cup, I decided to try it out. It is not as sweet at all, but it still has the nice chocolate flavor of the sweetened version. I can't have the mochas or anything fun at the coffee shop any more, so I decided to try a version at home. I love mixing my coffee with this stuff! So, good! I sweetened it up a bit with some NuStevia (more on that later-love this stuff) and I have my own mocha coffee in the comfort of my home for way less money than the coffee shop! After seeing HEAB mention the Chocolate Almond Milk the other day, I remembered I had some in the pantry. This definitely helped me warm up by the fire yesterday! So, I am freezing to death. I really think I am. Ok, not really, but it feels that way! I broke out in hives on Monday night and I think it is a reaction from the cold. It came out of nowhere. My skin was burning and itching all over. This happened one other time about 5 years ago and it was when we got a cold snap. I had no other antihistamines in the house except Benedryl and it has lactose in it. I had to take it. The illustrator offered to go and get me something else, but I was in need of something then and it was too late to go out looking for allergy medicine. So, I took it. Ugh, my stomach has been a mess for days now. Funny how some things like that stick with you for so long...not funny ha, ha though. So, I looked up hives to get a little more information and you can get them from food sources, but you can also get them from the cold. I am only assuming that is the problem, but it sounds pretty accurate to me. This time of year my asthma acts up too (I am a treat right now!). I have been taking my good old standby Alavert, so things are getting better. Not completely gone, but better. In addition to the allergy medicine, I have been trying to eat things that really help keep you warm and help you feel better. After my review of Almond Breeze a while back, I was told by a friend of mine that the chocolate version is amazing. So, the illustrator and I decided to give it a try. Wow, that stuff is so good! Too good if you ask me. I don't normally drink my calories, so I was a little worried about liking that one so much. I came across a less sweet version of the Chocolate Almond Breeze on sale and thought I would give it a try. I like being able to control the amount of sugar I am drinking. With only 45 calories a cup, I decided to try it out. It is not as sweet at all, but it still has the nice chocolate flavor of the sweetened version. I can't have the mochas or anything fun at the coffee shop any more, so I decided to try a version at home. I love mixing my coffee with this stuff! So, good! I sweetened it up a bit with some NuStevia (more on that later-love this stuff) and I have my own mocha coffee in the comfort of my home for way less money than the coffee shop! After seeing HEAB mention the Chocolate Almond Milk the other day, I remembered I had some in the pantry. This definitely helped me warm up by the fire yesterday!
 I have also been craving blueberries lately. Which is weird, because they really aren't my favorites in the fruit category. My in-laws brought us a few bags of frozen blueberries about a month ago, so I decided to change up my oats today. My phylosophy is, when you are craving something like that...you probably need whatever is in it! It was so good. Yesterday, I mixed the blueberries in the oatmeal when I cooked them. Today, I microwaved them for about 35 seconds and poured them on top. This really hit the spot! I sprinkled a little flax meal on there too for an extra boost! I was absolutely going to start this day off better! I have also been craving blueberries lately. Which is weird, because they really aren't my favorites in the fruit category. My in-laws brought us a few bags of frozen blueberries about a month ago, so I decided to change up my oats today. My phylosophy is, when you are craving something like that...you probably need whatever is in it! It was so good. Yesterday, I mixed the blueberries in the oatmeal when I cooked them. Today, I microwaved them for about 35 seconds and poured them on top. This really hit the spot! I sprinkled a little flax meal on there too for an extra boost! I was absolutely going to start this day off better!
 I had my usual salad today, but with a quinoa bean burger that I was working on. The burger tastes delicious, but I need it to hold up a little better before I share that recipe. I keep a stash of homemade bean burgers in the freezer all the time. I absolutely love them! This was the first time I made them with quinoa, so I have to play with it a little more! I was trying to add more protein to the burger. Hopefully all of this good stuff will kick the hives outa here! I had my usual salad today, but with a quinoa bean burger that I was working on. The burger tastes delicious, but I need it to hold up a little better before I share that recipe. I keep a stash of homemade bean burgers in the freezer all the time. I absolutely love them! This was the first time I made them with quinoa, so I have to play with it a little more! I was trying to add more protein to the burger. Hopefully all of this good stuff will kick the hives outa here!Labels: beans, breakfast, burgers, gluten free, main course, product reviews |
| posted by Sarena Shasteen - The Non-Dairy Queen @ 4:11 PM |
|
|
|
| Monday, January 11, 2010 |
| Susta Sweetener Review |
 For those of you who don't know me, I will let you in on a little secret...I am a health nut. When you have had as many digestive issues as I have had...you get to the point where you only want to eat or drink things with a purpose. You always question what will happen if you eat or drink the wrong thing. I have always been into probiotics to ease my stomach in digestion. I am not going to lie...for years it was pretty unpleasant. So, when the makers of Susta asked me if I would be interested in trying out their product, I jumped on the idea. I don't eat very much sugar, but I do like a little sweetener in my coffee and, of course, when I bake. I have tried artificial sweeteners in the past and really have not been happy with the flavor and aftertaste. I was pleasantly surprised when I put this little packet in my morning cup of coffee! It smelled sweet, like fruit, and had no strange aftertaste. It really is tasty! So, a sweetener, with only 5 calories and is made from real natural ingrediants? Sounds great to me! I looked online to find out what the costs were for this product. Susta is comparable in price to other sweeteners and can easily be ordered from their site. For those of you who don't know me, I will let you in on a little secret...I am a health nut. When you have had as many digestive issues as I have had...you get to the point where you only want to eat or drink things with a purpose. You always question what will happen if you eat or drink the wrong thing. I have always been into probiotics to ease my stomach in digestion. I am not going to lie...for years it was pretty unpleasant. So, when the makers of Susta asked me if I would be interested in trying out their product, I jumped on the idea. I don't eat very much sugar, but I do like a little sweetener in my coffee and, of course, when I bake. I have tried artificial sweeteners in the past and really have not been happy with the flavor and aftertaste. I was pleasantly surprised when I put this little packet in my morning cup of coffee! It smelled sweet, like fruit, and had no strange aftertaste. It really is tasty! So, a sweetener, with only 5 calories and is made from real natural ingrediants? Sounds great to me! I looked online to find out what the costs were for this product. Susta is comparable in price to other sweeteners and can easily be ordered from their site.
 I don't do "sweet" oatmeal, but you know that is the real test for me! I loved it. It added a nice sweetness without taking over the flavor. I don't do "sweet" oatmeal, but you know that is the real test for me! I loved it. It added a nice sweetness without taking over the flavor.
 I also gave it a whirl and baked with it. I tried out some mini muffins using my cobbler recipe as a base. I have never done that before, but thought why not give it a try. These cupcakes are fat free and low glycemic. I am not very familiar with baking with sweeteners like this, so the end result was a little sweeter than I would have liked, but again, I don't really do super sweet stuff. This would be nice to serve to someone that can't have sugar along with some fresh fruit and tea. It is always nice to have recipes on hand for your guests that are looking for a low/no sugar treat. We have quite a few in our extended family that can't have sugar so I will definitely be making these the next time they come over. I also gave it a whirl and baked with it. I tried out some mini muffins using my cobbler recipe as a base. I have never done that before, but thought why not give it a try. These cupcakes are fat free and low glycemic. I am not very familiar with baking with sweeteners like this, so the end result was a little sweeter than I would have liked, but again, I don't really do super sweet stuff. This would be nice to serve to someone that can't have sugar along with some fresh fruit and tea. It is always nice to have recipes on hand for your guests that are looking for a low/no sugar treat. We have quite a few in our extended family that can't have sugar so I will definitely be making these the next time they come over.
Susta Cupcake
4 cupcakes
31 packets Susta (I would cut is back to 20)
½ cup white wheat flour
1 tsp baking powder
pinch salt
½ cup almond milk
¼ cup applesauce
Preheat oven to 350 degrees. Spray or line a cupcake pan.
In a bowl, mix together the susta, flour, baking powder and salt. Next add the milk and applesauce to the dry mixture. Mix just until combined. Divide the mixture evenly in 4 cupcake cups. Bake for 25 minutes or until a toothpick in the center comes out clean. Serve warm with a fruit compote or allow them cool and ice with your favorite low sugar frosting.
Written for Go Dairy FreeLabels: cakes, muffins, product reviews |
| posted by Sarena Shasteen - The Non-Dairy Queen @ 2:05 PM |
|
|
|
| Saturday, January 9, 2010 |
| Snow Day In Atlanta! |
 When I got up yesterday morning, this is what my backyard looked liked. We live about 45 minutes outside of Atlanta so we don't see snow very often. It was about half inch, so it was enough to keep the kiddies home from school! The problem was more of an ice issue than a snow issue. So, I needed a big ol' mug of this... When I got up yesterday morning, this is what my backyard looked liked. We live about 45 minutes outside of Atlanta so we don't see snow very often. It was about half inch, so it was enough to keep the kiddies home from school! The problem was more of an ice issue than a snow issue. So, I needed a big ol' mug of this...
 Yes, I always have this much coffee in the morning in my favorite coffee cup. I have never been to Hawaii, but a good friend of mine brought this back for me and I love it! This was my first experience with Almond Dream almond milk. It was on sale at the natural food store so I thought I would give it a try. I thought it was pretty good. I still prefer Almond Breeze. I think Almond Dream is good, but I really love the flavor of my Almond Breeze! It's funny, because I tried it out on the illustrator (in his oatmeal) to see if he could tell a difference. He could, so it is not just my imagination. He asked if I did something different. I like doing that kind of stuff because it tells me if it's me or actually the flavor. While the kids were out playing in the snow and making this snow hump... Yes, I always have this much coffee in the morning in my favorite coffee cup. I have never been to Hawaii, but a good friend of mine brought this back for me and I love it! This was my first experience with Almond Dream almond milk. It was on sale at the natural food store so I thought I would give it a try. I thought it was pretty good. I still prefer Almond Breeze. I think Almond Dream is good, but I really love the flavor of my Almond Breeze! It's funny, because I tried it out on the illustrator (in his oatmeal) to see if he could tell a difference. He could, so it is not just my imagination. He asked if I did something different. I like doing that kind of stuff because it tells me if it's me or actually the flavor. While the kids were out playing in the snow and making this snow hump...
 I made this... I made this...
 There is nothing better than a warm bowl of hot stew when you come in from the snow! I wasn't sure the kids would like this since it has lentils, but they loved it! I love that lentils are so easy, nutritious and tasty! There is nothing better than a warm bowl of hot stew when you come in from the snow! I wasn't sure the kids would like this since it has lentils, but they loved it! I love that lentils are so easy, nutritious and tasty!
 I hope everyone else is staying warm! I hope everyone else is staying warm!Labels: beans, main course, product reviews, soup |
| posted by Sarena Shasteen - The Non-Dairy Queen @ 1:20 PM |
|
|
|
| Friday, January 8, 2010 |
| Gluten Free/Dairy Free Favorite Oatmeal Cookies |
 Oatmeal cookies are probably the illustrator's favorite. I have a recipe that I have used for years and really when you have something good, you don't mess with it. Years ago, I took a base recipe and tweaked it to suite the flavors that he really likes. He has been mentioning them for months now and I have put it off for fear that the gluten free version would never stand up to our tried and true version. The other problem is that I only buy gluten free oats from the natural food warehouse here because they are so expensive at the grocery store! So, a couple of weeks ago, I loaded up on gluten free oats just so I could make some cookies for him! Oatmeal cookies are probably the illustrator's favorite. I have a recipe that I have used for years and really when you have something good, you don't mess with it. Years ago, I took a base recipe and tweaked it to suite the flavors that he really likes. He has been mentioning them for months now and I have put it off for fear that the gluten free version would never stand up to our tried and true version. The other problem is that I only buy gluten free oats from the natural food warehouse here because they are so expensive at the grocery store! So, a couple of weeks ago, I loaded up on gluten free oats just so I could make some cookies for him!
 I decided to take them one step further on the healthy scale. I had some coconut oil and decided that we would go that route this time. I have never baked cookies with coconut oil and I am very pleased with the results! I baked them off, made a cup of coffee and delivered a cookie to the illustrator for an afternoon pick me up. I was so happy...I got the thumbs up! They were perfect! Not only that, the little ones liked them and they were gone in no time. I love it when things work out like this! So, now I have our Gluten Free/Dairy Free Favorite Oatmeal Cookies! I decided to take them one step further on the healthy scale. I had some coconut oil and decided that we would go that route this time. I have never baked cookies with coconut oil and I am very pleased with the results! I baked them off, made a cup of coffee and delivered a cookie to the illustrator for an afternoon pick me up. I was so happy...I got the thumbs up! They were perfect! Not only that, the little ones liked them and they were gone in no time. I love it when things work out like this! So, now I have our Gluten Free/Dairy Free Favorite Oatmeal Cookies!
 Gluten Free Favorite Oatmeal Cookies Gluten Free Favorite Oatmeal Cookies
1/2 cup white rice flour
1/4 cup buckwheat flour
1/2 teaspoon baking soda
1/2 teaspoon salt
8 TBSP softened coconut oil (not melted, just soft)
6 TBSP packed brown sugar
6 TBSP granulated sugar
1 large egg
1/2 teaspoon vanilla extract
1 1/4 cups gluten free oats (blend in a food processor to make oats a little smaller, but not flour)
1/2 cups raisins (chopped in a food processor)
1/2 cup nuts or seeds of choice
1/2 cup sweetened shredded coconut
Preheat the oven to 350 degrees. Whisk together the flours, baking soda, and salt in a bowl and set aside. Cream together the coconut oil and sugars until light and fluffy. Beat in egg and vanilla, scraping down the sides of bowl as needed. Add the flour mixture to the sugar mixture and beat just until combined. Next stir in the oats, raisins, nuts/seeds and coconut just until combined. Drop level 1/4-cup measures of dough onto baking sheets (I use my ice cream scoop) lined with parchment paper about 1 1/2 inches apart. Press down a little so they bake into a nice round cookie. Bake until they are golden brown and soft to the touch about 18minutes, rotating the cookie sheet halfway through. Cool 5 minutes on the cookie sheets and then transfer to a wire rack to cool completely.
You can make these smaller, just cut back on the baking time. The size I make them, makes them more like a granola bar...but a cookie!
Tip: To keep chewy cookies fresh, put a few mini marshmallows in the tupperware with the cookies. The take the moisture from the marshmallows.Labels: cookies, gluten free |
| posted by Sarena Shasteen - The Non-Dairy Queen @ 9:54 AM |
|
|
|
| Thursday, January 7, 2010 |
| Book Review: Let's Eat Out with Celiac/Coeliac & Food Allergies! |
 I received this book a while ago thinking that I was getting it for my own interests (dairy) and then realized a few months after that...the illustrator has celiac disease. So, I have been studying Let's Eat Out with Celiac/Coeliac & Food Allergies by Kim Koeller & Robert La France like crazy. We have never been the type of family that goes out to eat all that often anway, but when I was diagnosed with lactose intolerance we slimmed down our options even more than before. When you first realize that you can't eat some things, you figure what's the point of even going out anymore. For us, a large part of going out to eat is to socialize with your friends. Let's face it...I like to cook! So, I am always researching places to go so I can suggest places with ease of mind when people want to meet up with us. It's important to know where you can go and what is safe to eat. We are also not huge travelers at this point, but we have done a little bit. At the time we traveled, we went to France and I popped so many lactase enzyme pills before every meal, it looked rediculous! Those pills don't work for me so that was fun! I received this book a while ago thinking that I was getting it for my own interests (dairy) and then realized a few months after that...the illustrator has celiac disease. So, I have been studying Let's Eat Out with Celiac/Coeliac & Food Allergies by Kim Koeller & Robert La France like crazy. We have never been the type of family that goes out to eat all that often anway, but when I was diagnosed with lactose intolerance we slimmed down our options even more than before. When you first realize that you can't eat some things, you figure what's the point of even going out anymore. For us, a large part of going out to eat is to socialize with your friends. Let's face it...I like to cook! So, I am always researching places to go so I can suggest places with ease of mind when people want to meet up with us. It's important to know where you can go and what is safe to eat. We are also not huge travelers at this point, but we have done a little bit. At the time we traveled, we went to France and I popped so many lactase enzyme pills before every meal, it looked rediculous! Those pills don't work for me so that was fun!
Let's Eat Out with Celiac/Coeliac & Food Allergies is a great resource to have on hand. The authors are knowledgeable about allergies/intolerances and help you through making smart food choices when you dine out. I like how the book shares the journey of how Kim and Robert wrote Let's Eat Out together. She has celiac and his background is in the food industry. Having knowledge from both sides of the spectrum is very reassuring. The book starts out with how to approach eating outside of the home. It gives you guidelines on things you should know about your own food requirements and how that can help you educate the establishments you are going to. If we don't let restaurants know that we have these needs, they won't know how to accomodate us. Let's Eat Out then takes you through ingredients and gives you a quick reference guide to help you locate possible allergens throughout the book at a glance. Next the book takes you on a chapter adventure through different cuisines. I, personally, find that extremely helpful. The authors explain popular dishes for each cuisine along with sample menus, what types of allergens may be in them and how to order them for your safety. The book ends with an allergen free preparation checklist. This is extremely helpful for taking a quick glance at a cuisine to see what you need to be careful of when you are ordering. Let's Eat Out with Celiac/Coeliac & Food Allergies by Kim Koeller & Robert La France gives you great information to make eating out and traveling with food allergies a lot easier.
Written for Go Dairy FreeLabels: allergies, product reviews |
| posted by Sarena Shasteen - The Non-Dairy Queen @ 2:34 PM |
|
|
|
| Tuesday, January 5, 2010 |
| Sweet Potato Oats! |
 So, another day of crazy running around! I thought this would be a day of getting back on track since the kids were back in school, but NO. We had a little drama that sent me running errands around the world, but now things are back to normal. Luckily, we started the day off with this extraordinary bowl of brown sugar sweet potato oats! Nothing starts my day off better than a new discovery of a favorite flavor of oats. Well, this one is definitely high up on the list anyway! I found a few sweet potatoes lingering in the pantry from Thanksgiving so I threw them in the oven the other night while I was baking some other potatoes to go with dinner. While there is nothing wrong with baking a potato in the microwave, baking it in the oven is really so much better (in my opinion). So, we have been snacking away on the sweet potatoes when I thought about how much I love pumpkin oats...why not sweet potato oats? The illustrator asked what I did differently (thinking they were pumpkin). He said they were better than normal and asked if I added more sugar to them. Well, no...they aren't pumpkin at all. The flavor is so sweet and they are so creamy! If you are looking for a good winter flavored oatmeal...you should definitely try these out! So, another day of crazy running around! I thought this would be a day of getting back on track since the kids were back in school, but NO. We had a little drama that sent me running errands around the world, but now things are back to normal. Luckily, we started the day off with this extraordinary bowl of brown sugar sweet potato oats! Nothing starts my day off better than a new discovery of a favorite flavor of oats. Well, this one is definitely high up on the list anyway! I found a few sweet potatoes lingering in the pantry from Thanksgiving so I threw them in the oven the other night while I was baking some other potatoes to go with dinner. While there is nothing wrong with baking a potato in the microwave, baking it in the oven is really so much better (in my opinion). So, we have been snacking away on the sweet potatoes when I thought about how much I love pumpkin oats...why not sweet potato oats? The illustrator asked what I did differently (thinking they were pumpkin). He said they were better than normal and asked if I added more sugar to them. Well, no...they aren't pumpkin at all. The flavor is so sweet and they are so creamy! If you are looking for a good winter flavored oatmeal...you should definitely try these out!
 Sweet Potato Oatmeal Sweet Potato Oatmeal
1/2 cup gluten free oatmeal (I used Bob's Red Mill)
1/4 cup baked sweet potato
1 cup water (plus a little if needed)
2 TBSP almond milk
1 TBSP brown sugar
Combine oatmeal, sweet potato and water in a microwave safe bowl. Cook for 2 minutes. Stir and add a little more water if you need to. Cook for another 2 minutes. Stir. Next add the brown sugar and almond milk on top.
 I know I have mentioned this before, but if you don't stir the sugar into the oats, you don't have to add as much sugar. The sugar melts on the hot oats and mixes in with the almond milk. This is the trick I use to cut calories and still get a good amount of sweetness in your oats. I know I have mentioned this before, but if you don't stir the sugar into the oats, you don't have to add as much sugar. The sugar melts on the hot oats and mixes in with the almond milk. This is the trick I use to cut calories and still get a good amount of sweetness in your oats.Labels: breakfast, gluten free, vegetables |
| posted by Sarena Shasteen - The Non-Dairy Queen @ 1:37 PM |
|
|
|
| Sunday, January 3, 2010 |
| Perfect Holiday Gift! |
 So, today is a cleaning day...ugh! I am avoiding it, but it really needs to be done. I had intentions to do it yesterday, but my morning was immediately interrupted when I woke up to find my girl kitty (who has a broken leg from Thanksgiving) had removed her cast some time during the middle of the night. This sent me directly to the vet...that was closed, to then go to another vet that was so nice to help me out! This saved me time (from the emergency vet) and money! Unfortunately, with a lack of coffee and fuel to start the day, I did not get coffee or oatmeal until 11am. When I got back, I restarted my day with my butt on the couch to enjoy my daily coffee and pretend that my Saturday was just beginning. Unfortunately, the clock does not roll back! Oh well, it was not a bad day, just a strange day. So, today is a cleaning day...ugh! I am avoiding it, but it really needs to be done. I had intentions to do it yesterday, but my morning was immediately interrupted when I woke up to find my girl kitty (who has a broken leg from Thanksgiving) had removed her cast some time during the middle of the night. This sent me directly to the vet...that was closed, to then go to another vet that was so nice to help me out! This saved me time (from the emergency vet) and money! Unfortunately, with a lack of coffee and fuel to start the day, I did not get coffee or oatmeal until 11am. When I got back, I restarted my day with my butt on the couch to enjoy my daily coffee and pretend that my Saturday was just beginning. Unfortunately, the clock does not roll back! Oh well, it was not a bad day, just a strange day.
 I needed to go to the store for a few things (my usual fruits and veggie), but luckily I have a huge stash of fresh citrus fruit to enjoy thanks to my parents! The case of fresh citrus fruit is a traditional gift that my grandparents used to send my parents every year. They lived in Florida and seriously, what better gift can you send from Florida? I love this tradition and I hope my parents keep it up! If you are ever wondering what to get someone that loves fresh fruits and veggies...it is a boat load (or box) of fruits and veggies! My diet is mostly raw fruits and vegetables, so this was such a nice surprise when I received it a week before Christmas! Here it is, the first part of January and I am still enjoying every bit of it...the gift that keeps on giving! Now, with tons of oranges, tangerines and grapefruits...I need to work on some recipes with citrus fruits. Besides, all this vitamin C should help keep the rest of us from getting whatever funk the illustrator has been suffering from! I needed to go to the store for a few things (my usual fruits and veggie), but luckily I have a huge stash of fresh citrus fruit to enjoy thanks to my parents! The case of fresh citrus fruit is a traditional gift that my grandparents used to send my parents every year. They lived in Florida and seriously, what better gift can you send from Florida? I love this tradition and I hope my parents keep it up! If you are ever wondering what to get someone that loves fresh fruits and veggies...it is a boat load (or box) of fruits and veggies! My diet is mostly raw fruits and vegetables, so this was such a nice surprise when I received it a week before Christmas! Here it is, the first part of January and I am still enjoying every bit of it...the gift that keeps on giving! Now, with tons of oranges, tangerines and grapefruits...I need to work on some recipes with citrus fruits. Besides, all this vitamin C should help keep the rest of us from getting whatever funk the illustrator has been suffering from!
After I clean the house...I am back in the kitchen! Thanks Mom and Dad!Labels: holidays |
| posted by Sarena Shasteen - The Non-Dairy Queen @ 12:41 PM |
|
|
|
| Friday, January 1, 2010 |
| Happy New Year 2010! |
 We had our new year's feast about an hour ago. I like doing holiday meals around the 2-3 o'clock time. That way, I don't have to cook too many meals in one day and the big clean up is done earlier! Our new year's feast was a maple brown sugar glazed ham, black eyed peas with rice, steamed cabbage and cornbread muffins. I feasted on black eyed peas, cabbage and two of those big fat cornbread muffins! YUM! So, lots of money and luck for me this year...bring it on 2010! I hope everyone is enjoying there day and that every one has a great year! We had our new year's feast about an hour ago. I like doing holiday meals around the 2-3 o'clock time. That way, I don't have to cook too many meals in one day and the big clean up is done earlier! Our new year's feast was a maple brown sugar glazed ham, black eyed peas with rice, steamed cabbage and cornbread muffins. I feasted on black eyed peas, cabbage and two of those big fat cornbread muffins! YUM! So, lots of money and luck for me this year...bring it on 2010! I hope everyone is enjoying there day and that every one has a great year!
I know you can buy glazed hams at the store, but I chose to not spend the $75 for that one and did my own. Besides, I could recognize all of the ingredients in my glaze! There is always something to be said for that.
Maple Brown Sugar Glazed Ham
5 lb. semi boneless ham (precooked)
1/2 cup brown sugar
1/4 cup pure maple syrup
1 TBSP spicy mustard
couple shakes of pumpkin pie spice
Preheat the oven to 325 degrees. Wrap ham in aluminum foil and bake according to package directions.
Mix brown sugar through spices together in a microwave safe bowl and microwave for 1 minute. Stir and then microwave in 30 second intervals until all melted and gooey.
30 minutes before the ham is done, pour half of the glaze over the top of the ham. After 15 minutes, glaze with remainder of the glaze. Let rest for 20 minutes before serving.Labels: gluten free, holidays, main course |
| posted by Sarena Shasteen - The Non-Dairy Queen @ 4:27 PM |
|
|
|
|
| New Year's Traditions |
 (sorry for the reused photo) (sorry for the reused photo)
Happy New Year! This is going to be a good one...I am going to make it happen!
Do you do the traditional New Year's meal? Ok, so that was kind of a silly question because I have come to realize that the meal is really not so traditional. I grew up with the southern tradition of ham, black eyed peas and collards. We did this every year with the hope of progress, money and luck! My meal has changed slightly since I am not a fan of collards, oh and I don't eat ham. I do black eyed peas and steamed cabbage (toot toot). So, apparently, I just go for the money and luck! The illustrator did not grow up with this tradition, but since he likes all of these foods, it has evolved into our tradition. Luckily, the boys have discovered their love of black eyed peas (and money and luck) so the meal is a permanent tradition here now!
After discovering my love of the pressure cooker..I can have beans all the time. Since I don't eat meat and soy is a major no no...beans are a staple in my diet! I have discovered too, the more you eat (not the more you toot), your stomach gets used to them. Everyone always asks me that. I eat them all the time. Trust me, beans are the least of my stomach issues!
So, check out this easy way to make your beans today! I will share more from that meal later!Labels: beans, side dishes |
| posted by Sarena Shasteen - The Non-Dairy Queen @ 10:35 AM |
|
|
|
|
|
Name:
Sarena Shasteen - The Non-Dairy Queen
Home: Atlanta, GA, United States
About Me: Lactose Challenged
See my complete profile
|
Previous Post |
|
| Archives |
|
|
| Links |
|
|
| Blogs I Like |
|
|
|
|
|


